How to create a rehabilitation handout
You can quickly and easily create professional rehabilitation handouts with The Rehab Lab. To create a rehabilitation programme, follow these simple steps:
1. Login to The Rehab Lab
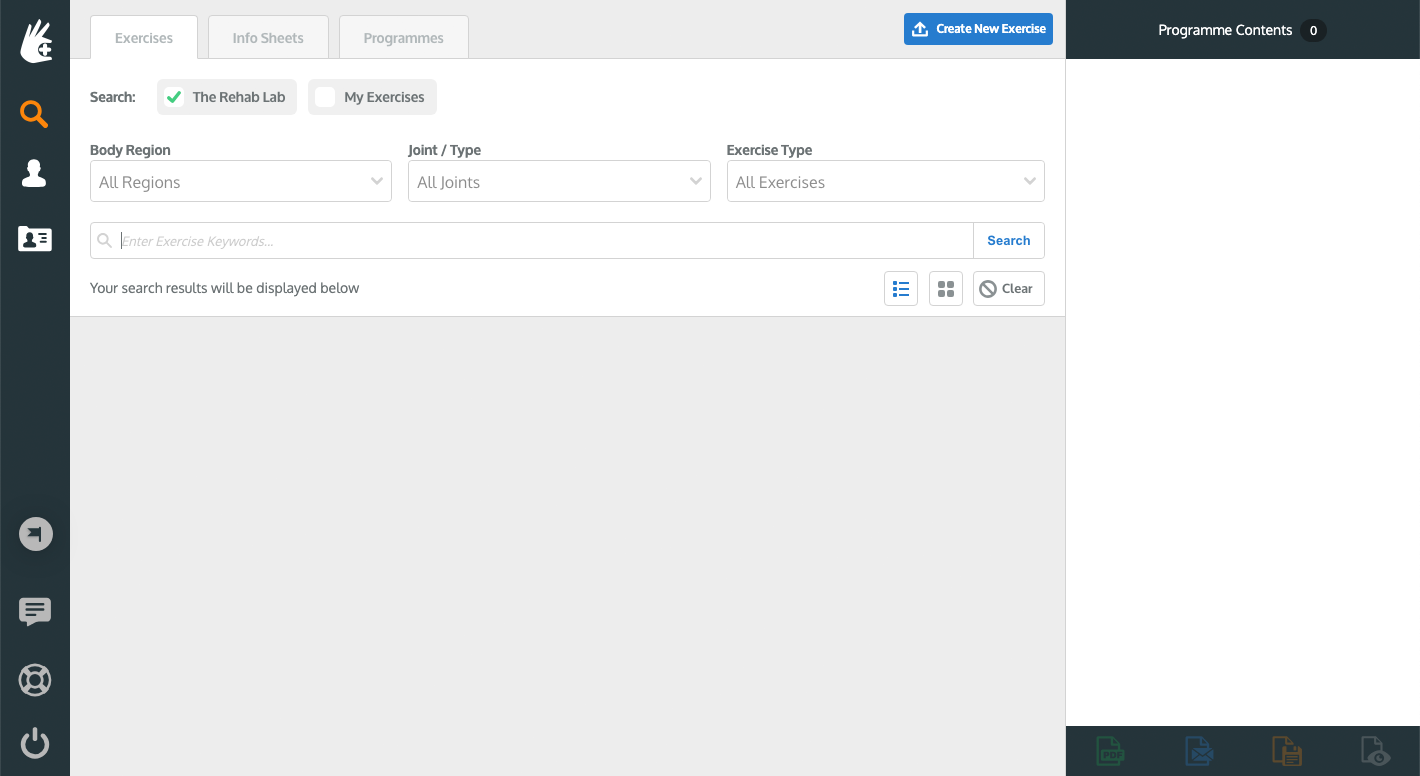
Go to The Rehab Lab login screen and enter your username and password. After clicking the 'LOGIN TO THE REHAB LAB' button The Rehab Lab's main screen will open. This is the EXERCISE SEARCH screen.
2. Search for exercises to add to your new programme
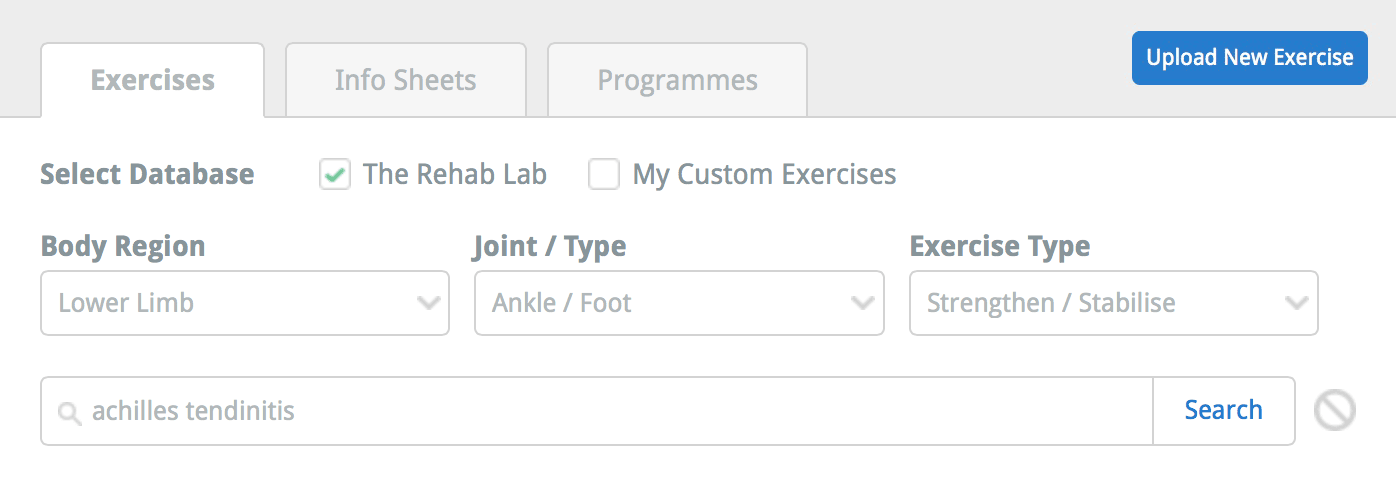
The Rehab Lab Exercise Search screen has helpful search options to enable you to find the exercises you require quickly and easily. These options can help refine your search results by body region (upper limb, lower limb, trunk, other), by joint and by exercise type (stretching & mobilising, strengthening & stabilising or neural and 'other'). You can also enter keywords to refine your search further.
Depending on the exercise you are searching for, from the drop-down menu, select the associated JOINT and EXERCISE TYPE, and click the SEARCH button (or simply press 'enter' on your keyboard).
3. Select your exercise from the search results
The number of exercises retrieved in your search is displayed below the keyword input. All the exercises that match your search criteria will be displayed in the search results area. Each exercise is displayed as an 'EXERCISE TILE'.
The EXERCISE TILE displays a thumbnail preivew of the exercise image, the exercise title, the exercise type (stretching & mobilising, strengthening & stabilising or neural and 'other'), an excerpt of the exercise description and three ACTION buttons.

These ACTION buttons are:
1. DELETE EXERCISE for removing the exercise from your custom exercise database (this button is only enabled if the exercise is one of your custom exercises)
2. PREVIEW EXERCISE (this opens the PREVIEW EXERCISE window where you can see a larger view of the image, the full exercise description and more information about the exercise)
3. ADD EXERCISE TO PROGRAMME button (this adds the exercise to the PROGRAMME CONTENTS COLUMN on the right side of the screen).
To add your desired exercise to your new programme, click the green ADD EXERCISE TO PROGRAMME button (the plus icon), or on a desktop computer, simply drag the exercise into the PROGRAMME CONTENTS COLUMN on the right of the screen.
To preview an exercise, click the blue 'PREVIEW EXERCISE' button (the middle icon).
Once your exercise has been added to the PROGRAMME CONTENTS COLUMN on the right of the screen, you can now edit the exercise to your liking.
4. Edit your exercise
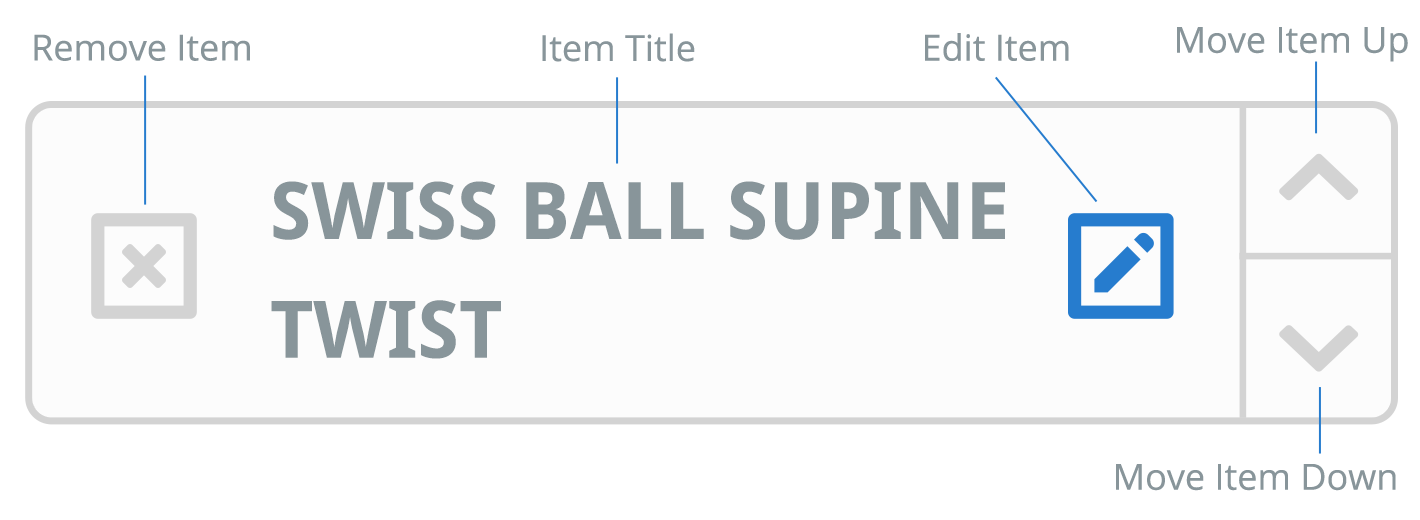
Once the item is added to the PROGRAMME CONTENTS COLUMN, you now have the option of editing the exercise to your preference and removing or re-ordering the item in your current programme. To edit your newly added exercise, click the blue EDIT ITEM button on the exercise tile in the PROGRAMME CONTENTS COLUMN (this is the blue pencil icon).
This will open the edit exercise window, where you can edit the exercise name, description, sets & repetitions and frequency.
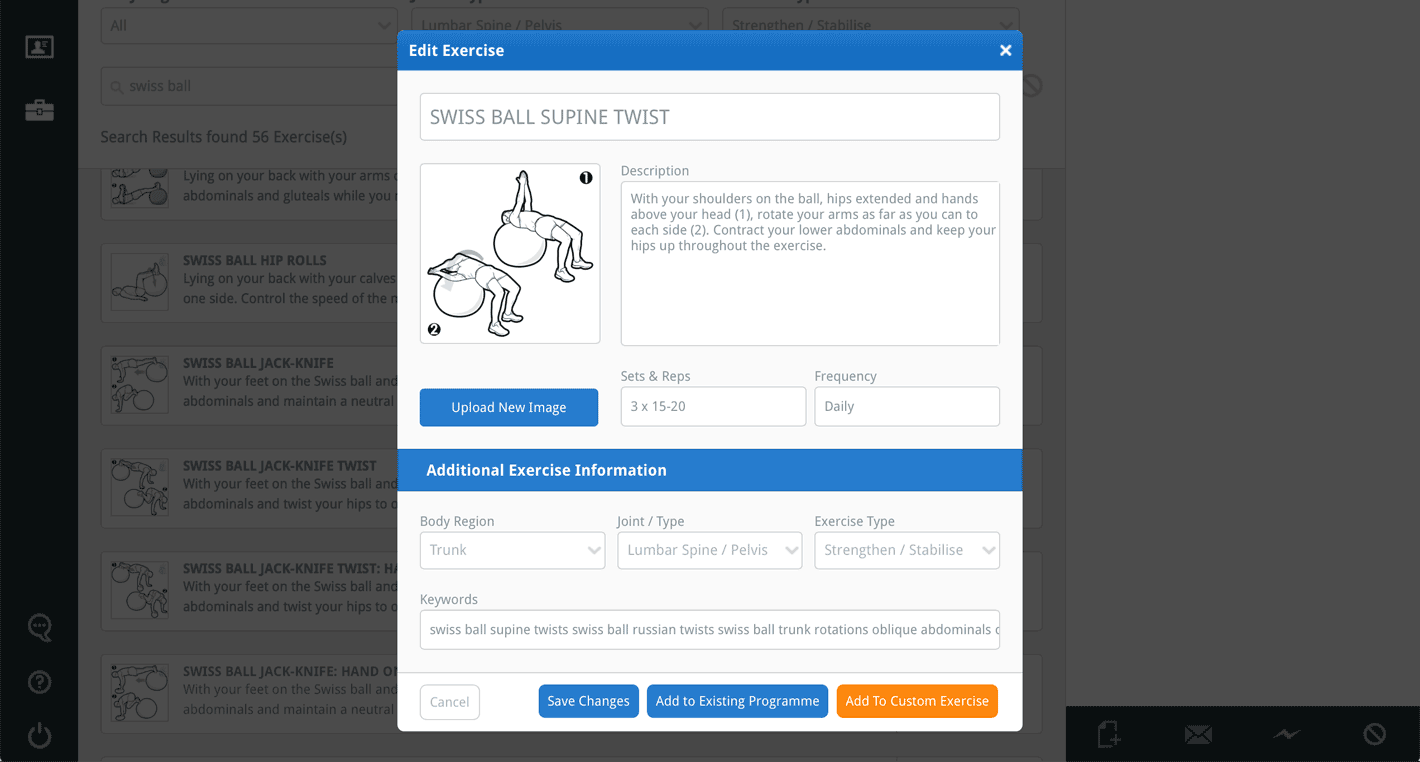
Once you have made your changes, click the Save Changes button.

5. Add More Exercises
Repeat steps 2, 3 and 4 until you have added all the exercises you desire.
6. Create your programme: as a PDF document, e-mail or save
Once you are happy with the contents of your new programme, you can now create the programme as a PDF document (which you can print or save to your computer), e-mail it directly to your client or save to your own database of custom programmes (to be used or edited any time you choose). To carry out any of these options, click the appropriate button, located at the bottom of the PROGRAMME CONTENTS COLUMN.
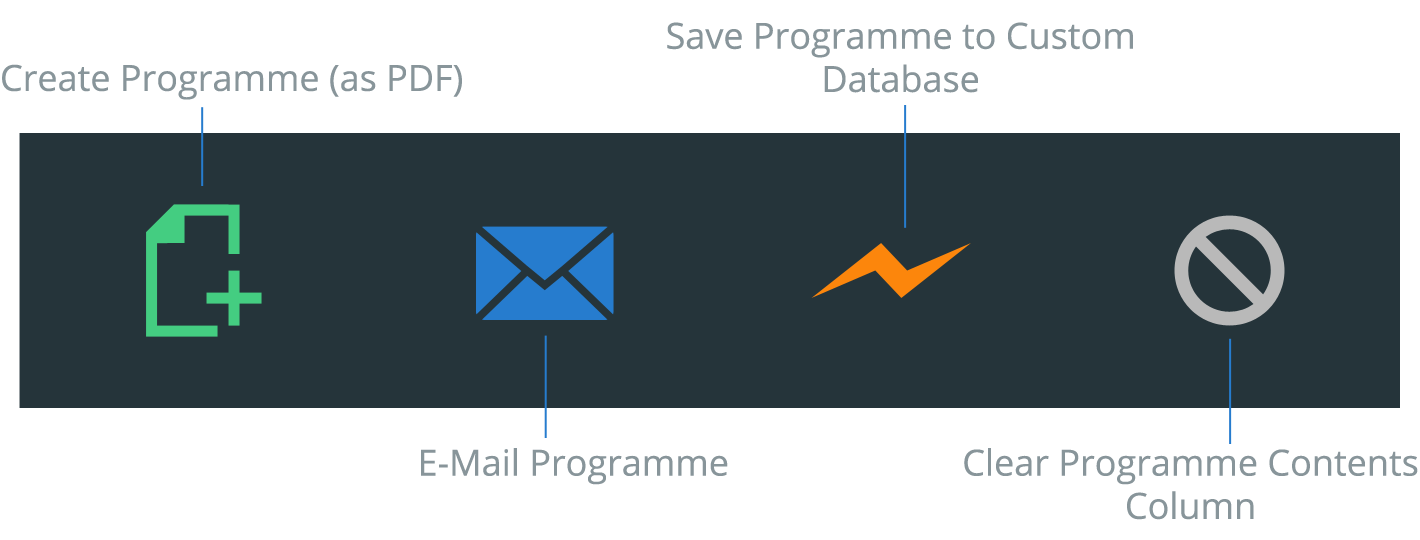
To create your programme as a PDF document (to print or save to your computer) click the green CREATE PROGRAMME (PDF) button. Clicking this button will open the CREATE YOUR PROGRAMME window.
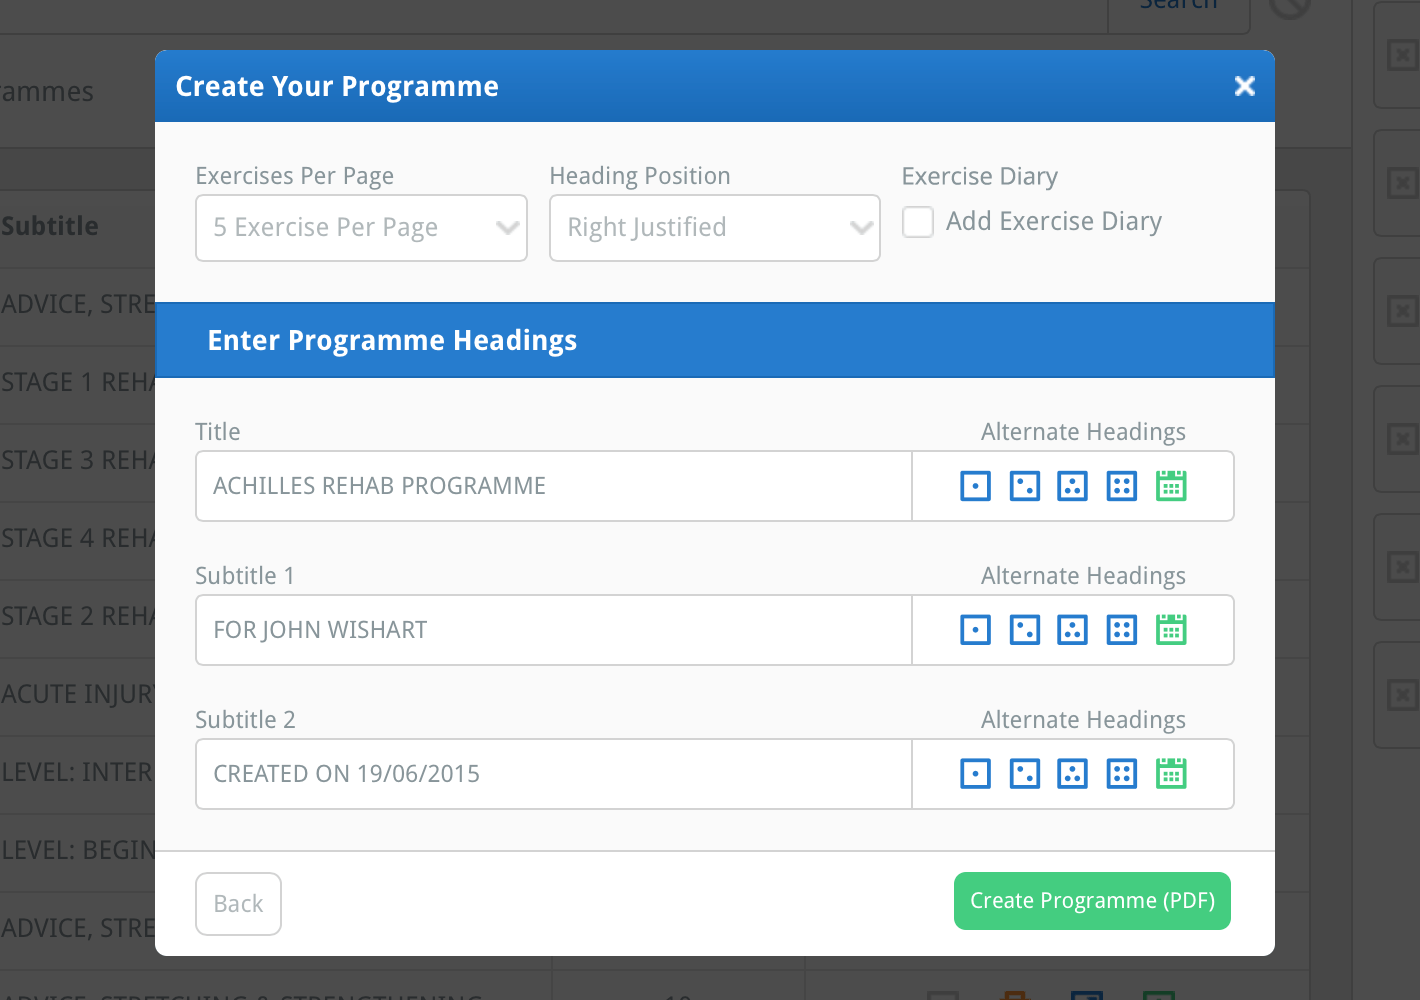
This window allows you to select your programme layout and titles.
Use the EXERCISES PER PAGE drop-down menu to select how many exercises you want to be displayed on each page of your programme. The default is set to 5 exercises per page, but you can change the default in the DEFAULT section found in your PROFILE.
Use the HEADING POSITION drop-down menu to set your heading justification to left, right or centred (note: centred omits your logo).
Select the EXERCISE DIARY check-box (so that a green tick appears) to add a 6-week exercise diary to the end of your programme.
Below the programme layout options is the ENTER PROGRAMME HEADINGS section where you can enter a title, primary subtitle (Subtitle 1) and secondary subtitle (Subtitle 2) (note: you may choose to leave these blank).
You also have the option of entering default titles in the DEFAULT section found in your PROFILE so that the titles are pre-loaded into their corresponding input fields when you open the CREATE YOUR PROGRAMME window (click here to learn more about your profile DEFAULTS).
To the right of the headings input fields are the ALTERNATE HEADINGS buttons. You can enter up to 4 alternate headings into the ALTERNATE HEADINGS section found in the DEFAULT section found in your PROFILE.

You can then click the corresponding icon to instantly add the heading to the input field. You can also click the green DATE BUTTON (the green calendar icon) to enter the current date to the end of the text that is currently in the input field (note: you can format the date to your requirements from the DEFAULT section found in your PROFILE).
Once you are happy with your layout selections and titles & subtitles, click the green CREATE PROGRAMME (PDF) button at the bottom of the window. Depending on the browser you are using, this will either open the PDF in a new browser tab/window or prompt you to save the PDF to your computer. You can now print your newly created programme, save it to your computer or e-mail it as an attachment (note: you can e-mail your programme to your client directly from The Rehab Lab).
To learn about e-mailing your programme, saving to your custom programme database and setting your programme defaults, click the appropriate link below:
How to e-mail your programme
How to save your programme to your custom programme database
How to set your default programme layout, headings and date format