How to upload an information sheet
The Rehab Lab allows you to create your own information sheets, complete with your own images. It is a quick and easy process. To upload your own information sheet first log in to The Rehab Lab and enter your username and password at the login screen. Once you have logged in, The Rehab Lab will load the EXERCISE SEARCH screen.
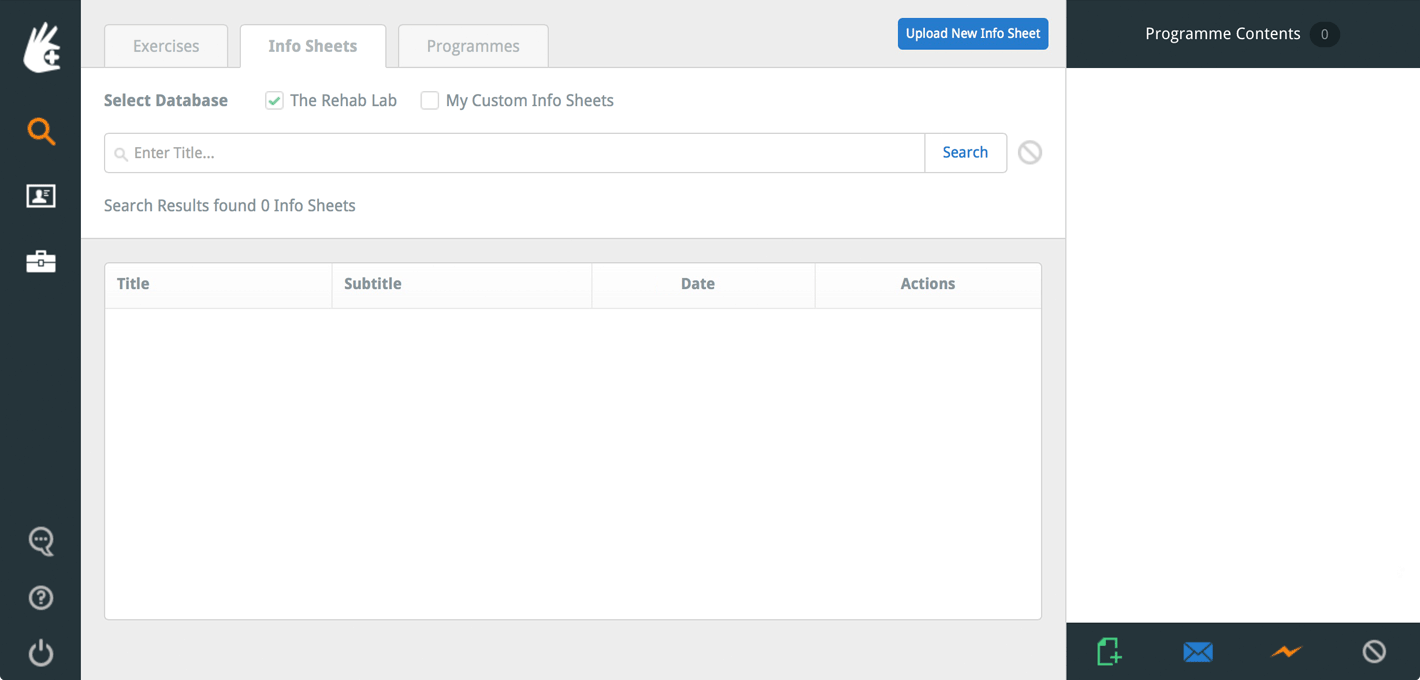
Now, click the INFO SHEETS tab at the top of the screen (between the EXERCISES and PROGRAMMES tabs). This will display the INFO SHEET SEARCH SCREEN.
1. Upload your Information Sheet
Locate and click the blue UPLOAD NEW INFO SHEET button. This will display the CUSTOM INFO SHEET SEARCH screen.
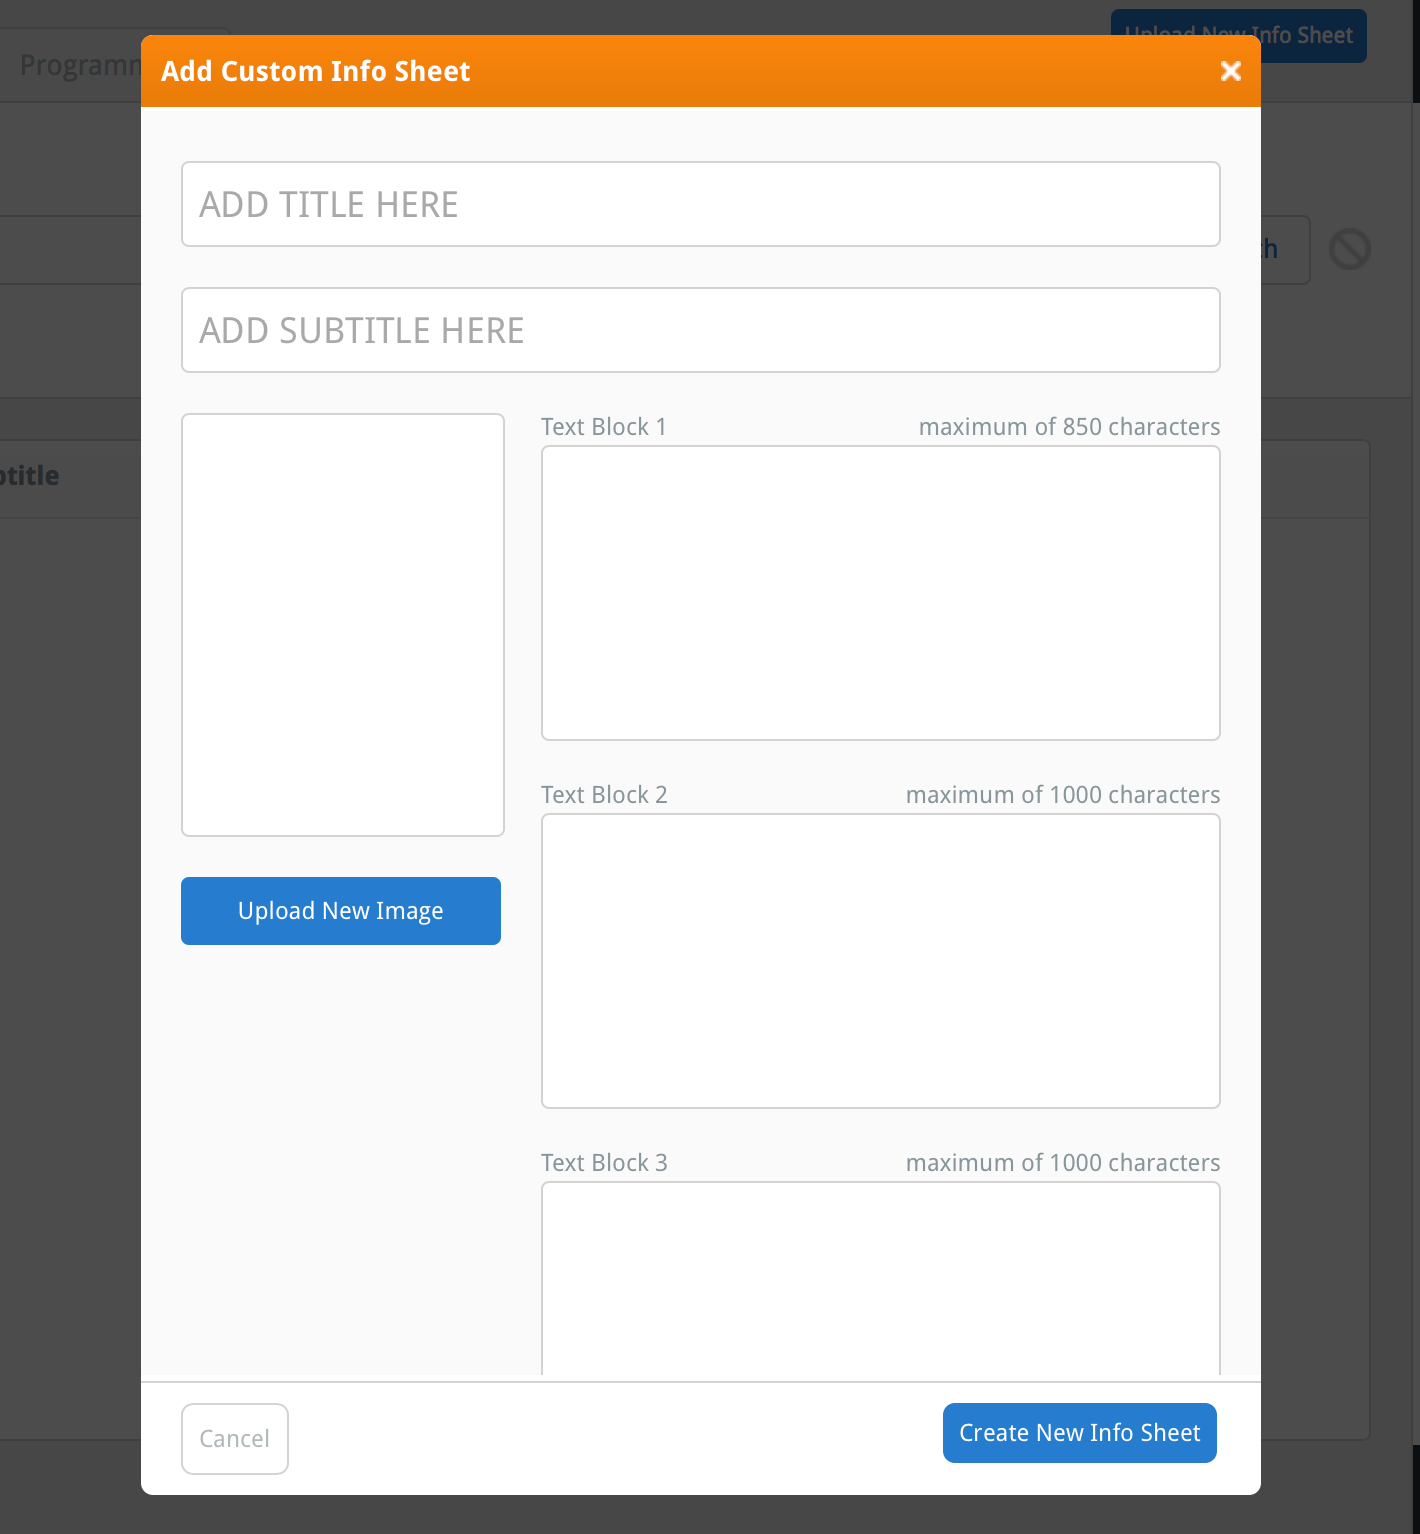
Enter a title and subtitle for your new custom information sheet in the first 2 text fields at the top of the window. Below the title and subtitle fields are four text blocks (named Text Block 1-4). Each of these text blocks displays the maximum characters (the number of letters, spaces and punctuation) allowed for each section. Enter your text into these fields.
2. Upload an image
Now you can upload an image, which will be displayed in the centre of your information sheet. To do this, click the blue UPLOAD NEW IMAGE button located below the image preview on the left side of the window.

This will open your computer's file browser window where you can locate and select the image you wish to upload to replace the information sheet's current illustration.
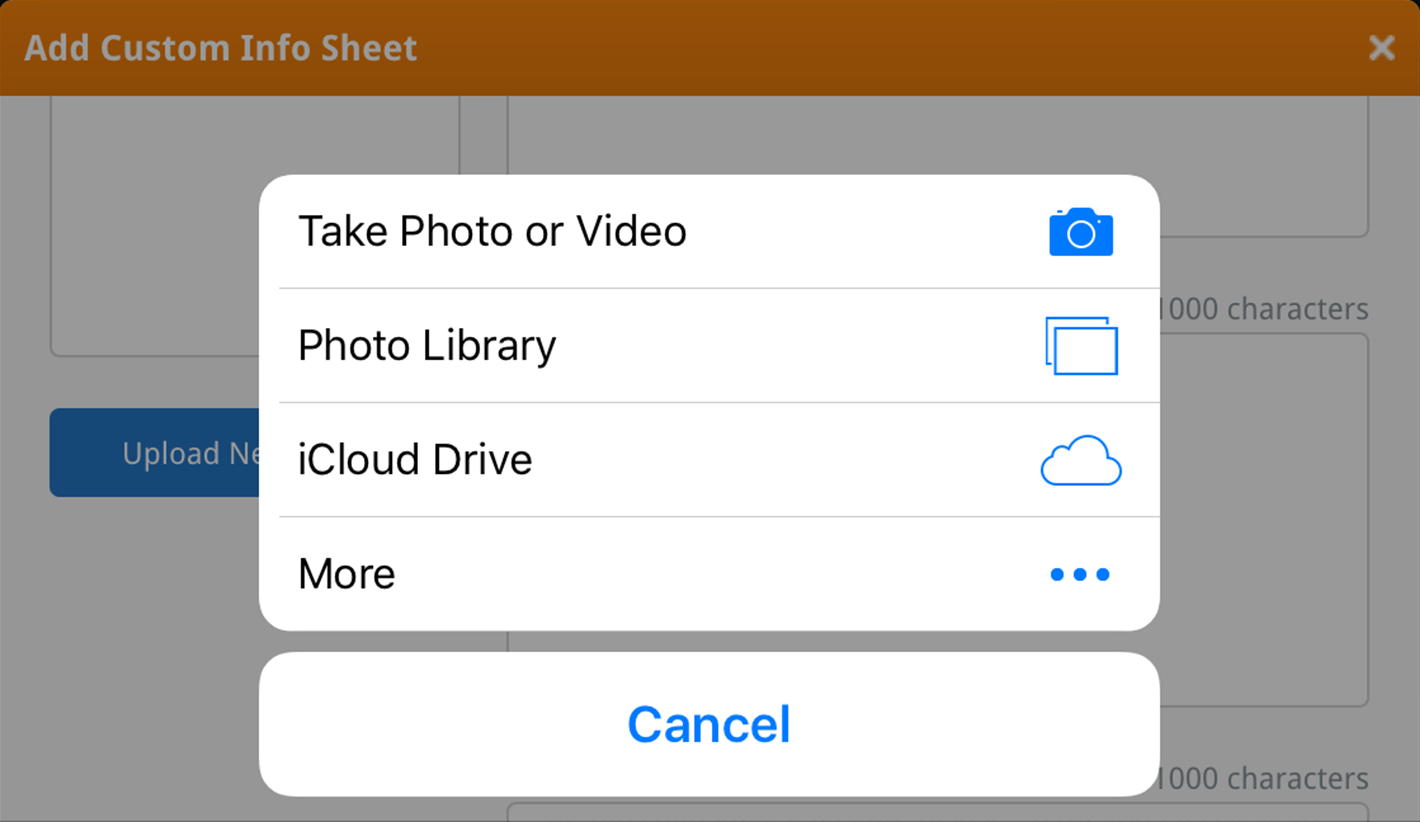
note: If you are using an iPad, clicking the UPLOAD NEW IMAGE button will prompt you to either take a photo with your iPad's camera, select an image from your camera roll/photo library or upload an image from iCloud Drive.
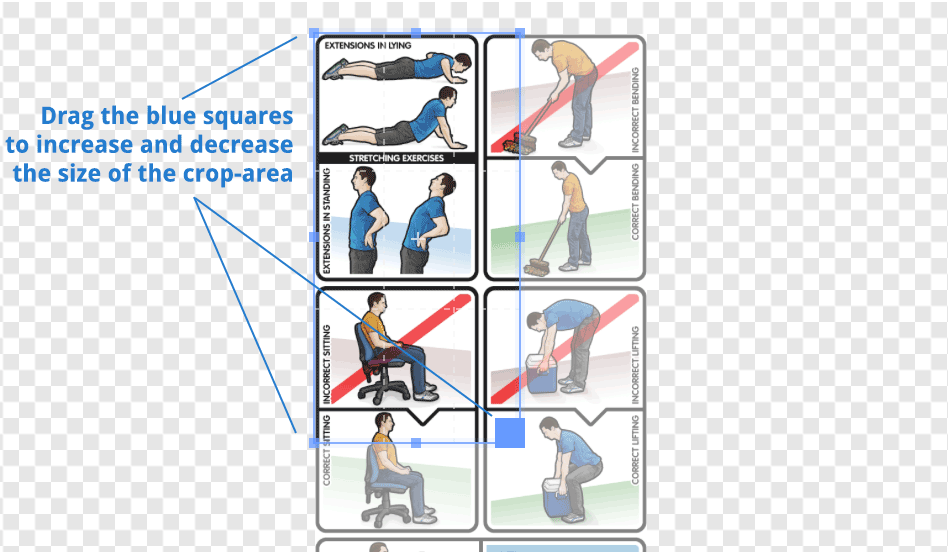
Once you have selected the image (or taken a photo), the CROP IMAGE window will appear. You can use this window to crop the image to the correct size to fit on your information sheet.
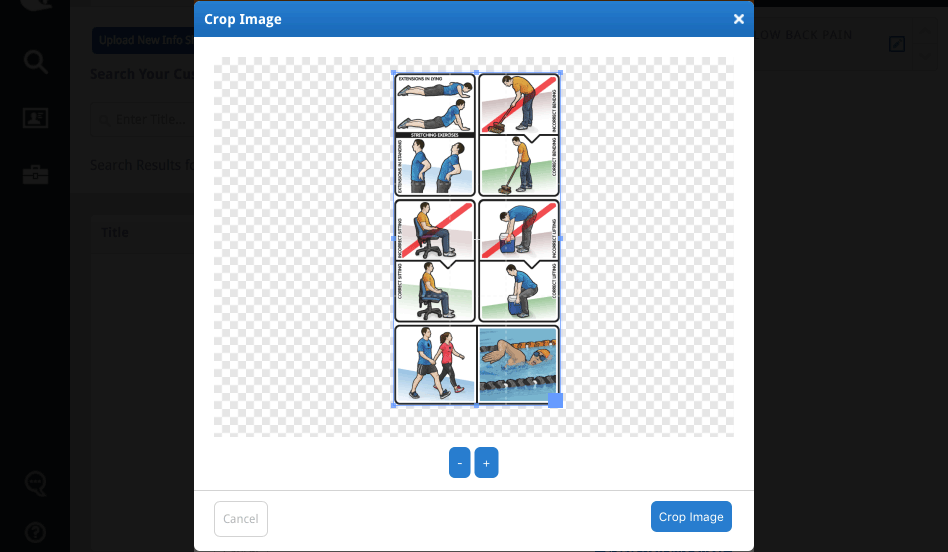
Your image will be cropped to the area displayed inside the blue rectangle: the crop-area. Use the plus (+) and minus (-) buttons below the image preview to zoom in or out. You can also use your mouse wheel or screen-pinch function on an iPad to zoom.

Use the small blue squares at each corner and side of the crop-area to increase or decrease its size. You can also drag the crop-area around the window. The faded part of the image outside the crop-area will be cropped-out of the image.
Once you are happy with your image cropping, click the blue CROP IMAGE button at the bottom-right of the window.

This will close the CROP IMAGE window and your cropped image will now be displayed in the image preview on the left of the window.
3. Create your new custom information sheet
Now that you are happy with the text you have entered and the image you have uploaded, click the blue CREATE NEW INFO SHEET button at the bottom-right of the window. You have now uploaded a new information sheet to your custom information sheet database.

To find your newly added custom information sheet in the future, simply select the MY CUSTOM INFORMATION SHEETS check-box in the SELECT DATABASE search options on the INFO SHEET search screen before clicking the SEARCH button.

To learn more about searching, editing and deleting custom information sheets, click the appropriate link below:
Searching for information sheets
Creating a custom information sheet
Editing a custom information sheet
Deleting a custom information sheet